Welcome to the world of Windows 11! Whether you’re new to computers or upgrading from an older version of Windows, setting up your new system can feel overwhelming. Don’t worry—this guide will take you through the setup process step-by-step in clear, simple language. Let’s begin!
Step 1: Turning on Your Computer
- Press the power button on your computer or laptop.
- Wait a moment while Windows 11 starts up. You’ll see a welcome screen.
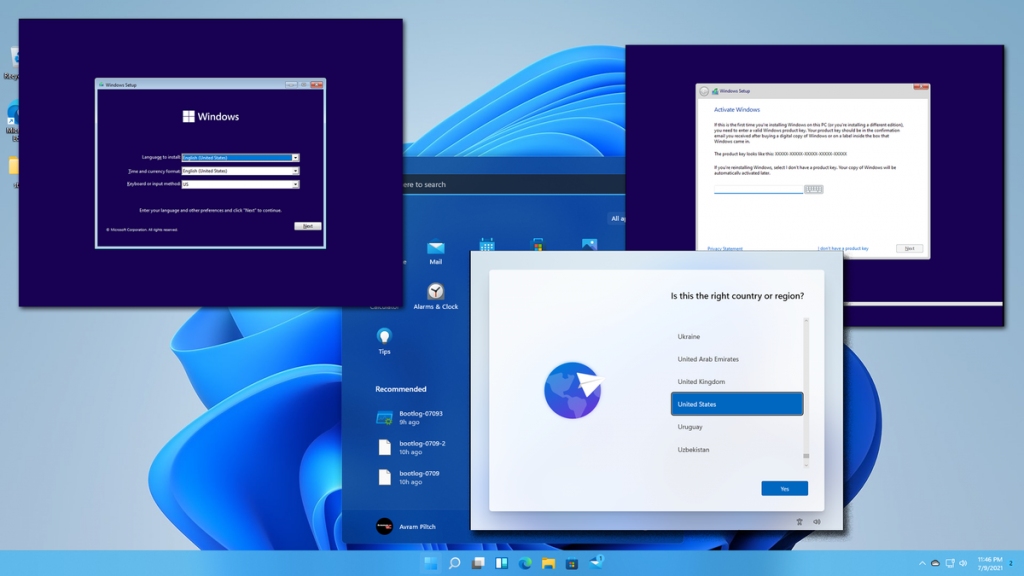
Step 2: Choosing Your Language and Region
- The first screen will ask you to select your language, region, and keyboard layout.
- Use the drop-down menus to pick the options that match your preferences.
- Click “Next” or “Continue” to proceed.
Step 3: Connecting to Wi-Fi
- You will be asked to connect to the internet.
- Find your Wi-Fi network name on the list.
- Click on it and enter the password (usually found on your router or given by your internet provider).
- Click “Connect.”
Step 4: Signing in with a Microsoft Account
- Windows 11 encourages you to sign in with a Microsoft account (an email address like Outlook or Hotmail).
- This helps keep your files safe and lets you use apps like Microsoft Store, OneDrive, and more.
- If you don’t have one, you can create a new account or choose to sign in offline (local account).
- Follow the on-screen instructions to enter your email and password.
Step 5: Setting Up Security
- You’ll be asked to create a PIN—a short number you can use to quickly unlock your computer.
- You might also be given options for facial recognition or fingerprint sign-in if your device supports it.
- Choose the security method you prefer, or skip for now.
Step 6: Privacy Settings
- Windows will ask about privacy options like location, diagnostics, and advertising preferences.
- You can turn these on or off based on your comfort level.
- Don’t worry, you can always change these settings later.
Step 7: Let Windows Do Its Magic
- Windows might take a few minutes to get everything ready.
- It will install updates and prepare your desktop.
- Be patient during this time.
Step 8: Exploring Your New Desktop
- Once setup is complete, you’ll see the Windows 11 desktop.
- The Start button is at the bottom center—click here to find apps and settings.
- The taskbar along the bottom shows your open programs and important icons.
Tips for New Users
- Take your time exploring. Click around and get comfortable.
- Use the “Help” feature if you’re stuck—just type what you need in the search box.
- Keep your computer updated by allowing Windows to install updates automatically.
- Consider asking a family member or friend for help if you feel unsure.
Conclusion
Setting up Windows 11 is straightforward, even if you’re new to computers. By following these simple steps, you’ll be up and running in no time. Enjoy your new computer and all the exciting things you can do with it!
If you have any questions or need further help, feel free to reach out or explore online tutorials designed for beginners.
Happy computing!
Leave a Reply